
One of the key aspects of modern web automation is using tools like n8n to handle all the boring processes.
And the best place to run it isn’t your laptop but a dedicated machine for the task.
I will show you to self-host n8n in your VPS, which is also needed for more advanced tools later on.
P.S. As usual, use AI to assist yourself, especially inside your server as explained here.
- Some details may change
- AI is your help throughout this guide
- Be careful with sensitive data
Table of Contents
Running n8n On Your Own Server
n8n is the workflow automation tool I use for Web Analytics work.
Pulling data from BigQuery, running keyword clustering, sending results to an LLM for analysis.
It’s powerful, open source and when you self-host it, also cheap.
n8n Cloud is fine if you want zero maintenance but if you run regular automations, the math changes quickly.
A small VPS costs a fraction of the cloud plan and gives you full control: your own databases, your own files, no usage limits, no per-execution pricing.
I will show you the setup I actually use, step by step.
It takes about 30 minutes and you will end up with a production-ready n8n instance.
Why A VPS Instead Of n8n Cloud
First, 2 terms so we are on the same page.
A VPS (Virtual Private Server) is a small computer that lives in a data center and runs 24/7.
You rent it monthly, you get your own operating system on it and you can install whatever you want. Think of it as a laptop that never sleeps and is always connected to the internet.
n8n is the workflow automation tool you install on it: you build automations visually, like connecting BigQuery to an email or a Slack channel and n8n runs them on schedule.
n8n is available in 2 flavors: cloud and self-hosted.
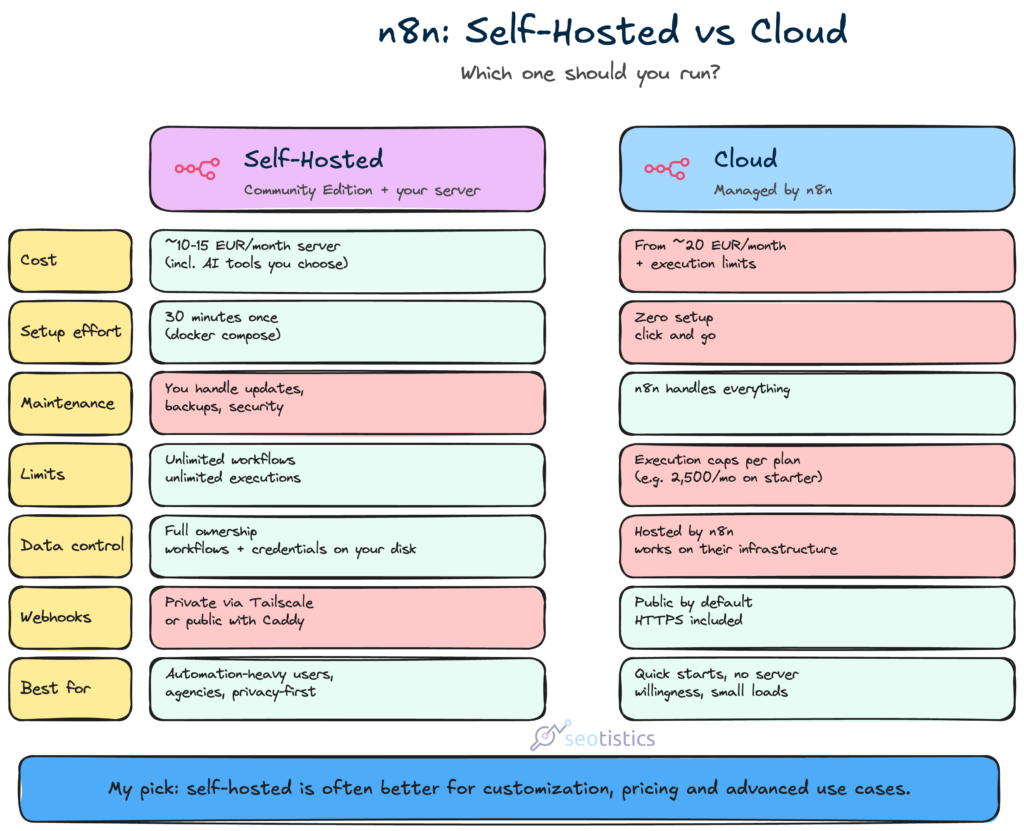
n8n Cloud handles hosting, updates and backups for you. You pay monthly per execution or per seat.
For a small business that runs a handful of workflows, that cost adds up and the limits start to annoy you.
Self-hosting means you are responsible for the server: updates, security, backups.
That sounds scary but it’s not because the whole stack fits in one docker-compose file and backups are one script.
I have run this setup recently and the maintenance is a few minutes per week.
Choosing Your Host: Hetzner
I use Hetzner and I recommend it for this use case, especially if you are part of an EU state.
You can start creating an account with them.
Their CX line of cloud servers is affordable per month (see table below), which is plenty for n8n plus a Postgres database plus a small file server.
- Reliable, no surprise outages
- Simple pricing, no hidden egress fees
- Good documentation and API
- Data centers in Europe and the US
Alternatives exist (DigitalOcean, Linode, Vultr) and they all work. I am not paid by Hetzner, I just like the price to performance ratio.
The only big caveat is that you NEED to avoid using VPNs when connecting to Hetzner or you will get banned.
What This Actually Costs
Let me put the numbers on the table, because this is the part that convinces people to stop paying for cloud plans.
| Component | Cost | What you get |
|---|---|---|
| Hetzner CX23 or CX33 | ~5-10 EUR/month | 2 vCPU, 4GB RAM, 40GB SSD. Enough for n8n + Postgres |
| Cloudflare R2 | ~$0.015/GB/month | Backups. 10GB of history costs pennies |
| Tailscale | Free (personal plan) | Private access to your server from anywhere |
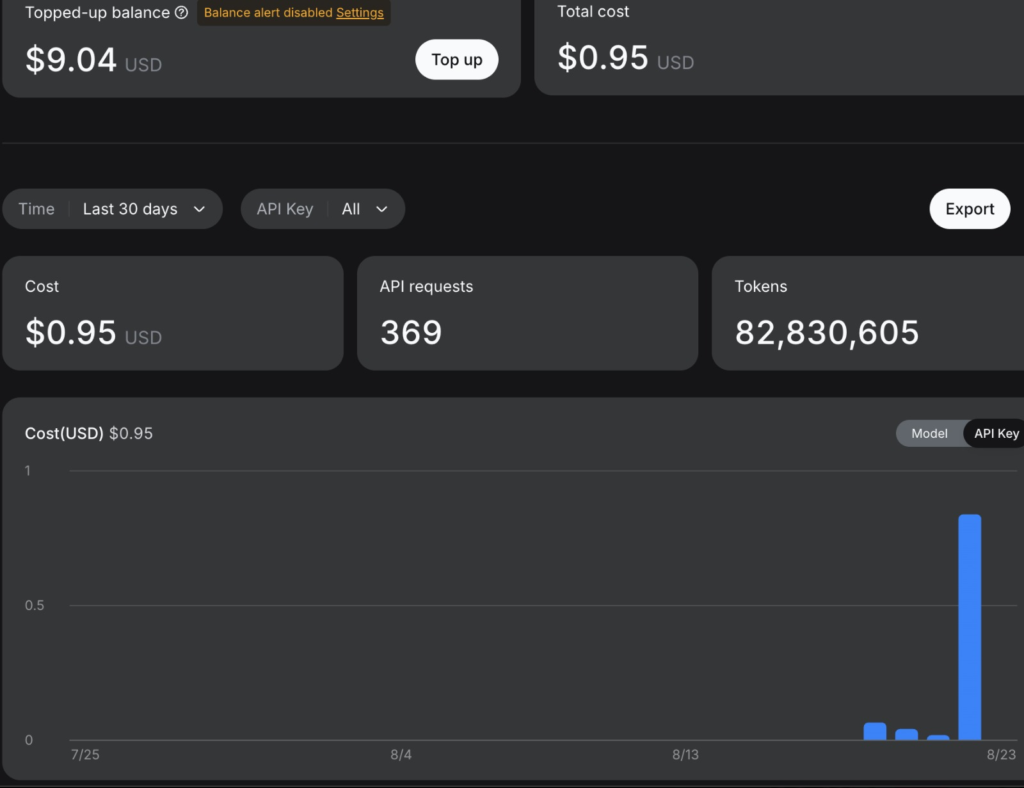
| Hermes Agent | Free | The actual AI assistant that will make it worth |
| Claude Code / Codex | Subscription or usage-based | The AI help that does the initial heavy lifting on the server |
| Domain (optional) | ~$10/year | Only if you want a clean URL for webhooks |
P.S. I was lucky enough to get CPX22 (another one I didn’t mention) at the old price of EUR 8.64/mo, now it’s like EUR 20/mo.
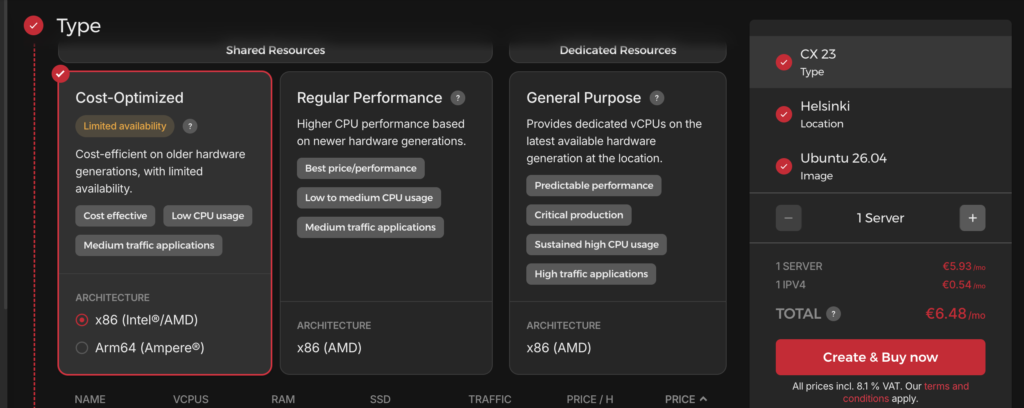
As the operating system, you can pick Ubuntu if that wasn’t already clear.
The headline number: you can run this entire setup for about 10-15 euros per month, plus whatever you spend on the AI assistant.
Compare that with n8n Cloud, where a single active workflow with decent execution volume costs more than that before you add seats.
And you own everything with self-hosting, uh.
No per-execution billing, no limits on how many workflows, no surprise invoice when one automation runs 10,000 times in a night.
Server Setup
Create a server with Ubuntu LTS (24.04 works well) and pick a region close to your audience and/or your country.
The smallest plan is fine to start, you can resize later.
Once it is up, SSH into it. SSH (Secure Shell) is just a secure way to open a terminal on your server from your laptop.
On macOS and Linux you can use the built-in terminal, on Windows you can use PowerShell or a tool like PuTTY.
First Time: Create Your SSH Key On macOS
The first time you connect to a Hetzner server from a new Mac, you will usually need to create an SSH key.
It’s like a digital ID card for your laptop: the server recognizes it and lets you in without typing a password every time.
Since I use macOS, I will start from it but if you need more info on the topic, help yourself with AI by feeding it this article.
Open the Terminal app on your Mac and run:
ssh-keygen -t ed25519 -C "youremail@example.com"It asks where to save the key, press Enter to accept the default (~/.ssh/id_ed25519).
It then asks for a passphrase, you can press Enter to skip it or set one if you want extra security (you will type it each time you use the key).
Two files are created: the private key (id_ed25519, never share this) and the public key (id_ed25519.pub, this is the one you give to servers). View the public key with:
cat ~/.ssh/id_ed25519.pubCopy the whole line that starts with ssh-ed25519.
Now, when you create the server in the Hetzner console, there is an SSH key section.
Paste your public key there.
Hetzner will install it on the server automatically, so your first ssh root@YOUR_SERVER_IP just works without a password prompt.
If you already created the server without adding the key, you can still use it.
Connect once with the password Hetzner emailed you, then add your key manually with ssh-copy-id root@YOUR_SERVER_IP.
After this your Mac can connect with one command and no password:
ssh root@YOUR_SERVER_IPThen update the system:
ssh root@YOUR_SERVER_IP
apt update && apt upgrade -y
Two things worth doing before anything else: create a non-root user and set up a firewall. The default UFW rules that allow only SSH are a good baseline.
Keep the firewall strict.
Allow SSH and if you plan to reach n8n through Tailscale, you don’t need to open port 5678 publicly at all (more on this here).
If you do need webhooks, open only the port behind the reverse proxy, never the n8n port itself.
Installing Tailscale (Your Private Network)
Before we install anything, one concept!
Tailscale is a tool that creates a private network between your devices, even when they are on different internet connections.
Think of it as a secret tunnel that only your laptop and your server can use.
Nobody else can see what travels through it and the server doesn’t need to expose its ports to the whole internet.
Why does this matter?
Because n8n stores credentials and workflow data.
You don’t want that sitting on a public address where anyone can try to log in. Tailscale keeps it reachable only by you.
Install It On The Server
curl -fsSL https://tailscale.com/install.sh | sh
tailscale up
Run that, log in from the printed URL and the server appears in your Tailscale admin panel under its own private IP (something like 100.x.x.x).
You can also see that IP from your Tailscale (web or desktop), tied to your VPS device, in my case ubuntu-4gb-nbg-1-1 , under the Adresses column.

Install It On Your Laptop
Install Tailscale on your laptop too (tailscale.com/download), log into the same account and both devices are now on your tailnet.
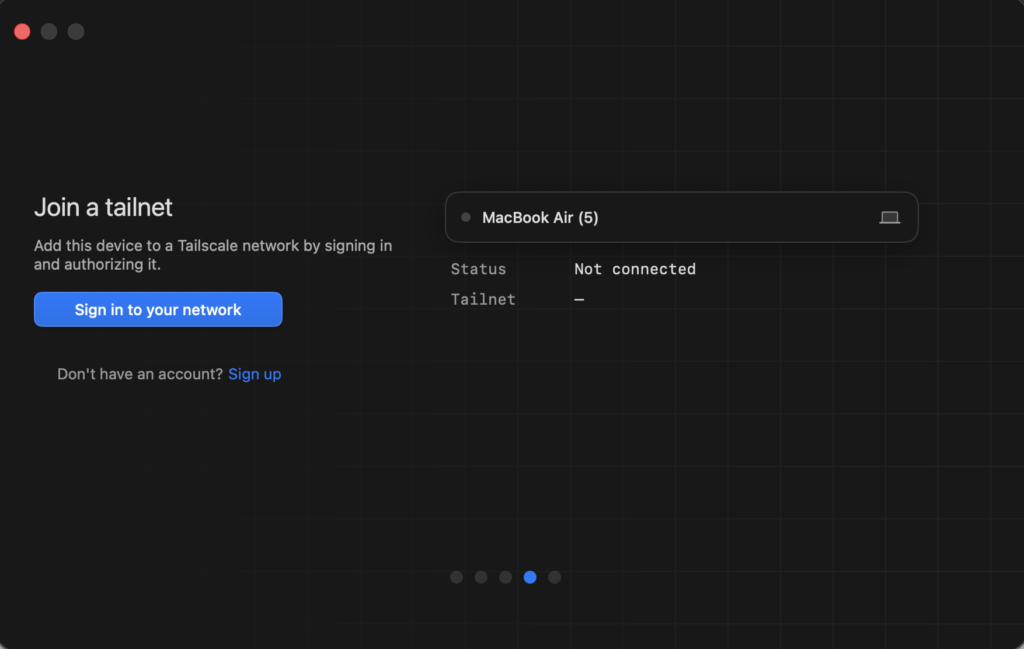
From now on you can SSH and reach n8n from anywhere and the traffic is encrypted end to end.
Access n8n Through The Private IP
Once everything is running, you open the editor at a private address like http://100.x.x.x:5678 instead of your public server IP (the one we used first).
No port exposed to the public internet, no reverse proxy needed for your own access.
The One Exception: Webhooks
The only case where Tailscale isn’t enough is webhooks.
If an external service (DataForSEO, Google, Zapier) needs to call your n8n webhook, that traffic can’t go through your private network, because the external service isn’t on it.
In that case you need a public path: a reverse proxy (Caddy or Nginx) with HTTPS in front of port 5678.
Caddy is the easiest, it gets a Let’s Encrypt certificate automatically.
So the rule is simple: Tailscale for your own access, Caddy only if you need external webhooks.
And the firewall stays on either way.
Installing Docker (What It Is First)
Docker is a tool that packages software into containers.
A container is like a box that contains a program and everything it needs to run, so it behaves the same on any machine.
Instead of installing n8n directly on your server (and dealing with version conflicts), you download a container that already has everything set up.
n8n runs in Docker and so does everything around it. The official install script is the fastest path:
curl -fsSL https://get.docker.com | sh
systemctl enable --now docker
Then install the compose plugin so you can manage the whole stack from one file:
apt install -y docker-compose-plugin
docker compose version
Talk To Your Server (No Need To Be A Developer)
Here is the part most guides skip.
Asking AI is simply the best way to get started with this since it’s a blank slate, you can’t lose anything.
You need a terminal and a way to keep working on the server without losing your mind.
Install Claude Code (or Codex) On The Server
Once you are inside, install an AI coding assistant directly on the server.
Claude Code is the one I use but Codex from OpenAI works the same way. Ideally, you would have both, Codex on a free plan is viable for this use case.
# Claude Code
curl -fsSL https://claude.ai/install.sh | bash

# or Codex
npm install -g @openai/codex
This will make following this guide remarkably easier.
You can log in to your account as a tab will open into your browser and then you are done.
Use Tmux (Or Cmux) So Work Doesn’t Die
The “interface” or the terminal offered by Hetzner is mediocre and doesn’t even register keystrokes correctly.
The fix is using a terminal multiplexer. It keeps your sessions alive even when you disconnect and it’s much better.
Tmux is the standard, it works everywhere:
apt install -y tmux
tmux new -s work
# do your stuff, then detach with Ctrl+B then D
tmux attach -t work   # come back later
If you are on macOS and live in the terminal, try cmux, you can install it on your computer AND connect directly to the VPS.
I am writing this again in case you didn’t get it.
It gives you tabs, a sidebar and notifications when an agent finishes plus a lot of quality-of-life improvements.
The Docker Compose File
Docker Compose is a small file that describes your whole stack in one place.
Instead of running each container separately, you write one file and Docker starts everything together. If the server reboots, everything comes back up automatically.
This is the core of the setup.
3 services: n8n, Postgres for its database and a small nginx file server for sharing files between your workflows and the outside world.
services:
  postgres:
    image: postgres:16
    restart: unless-stopped
    environment:
      POSTGRES_DB: n8n
      POSTGRES_USER: n8n
      POSTGRES_PASSWORD: change-me
    volumes:
      - postgres_data:/var/lib/postgresql/data
    healthcheck:
      test: ["CMD-SHELL", "pg_isready -U n8n"]
      interval: 5s
      timeout: 5s
      retries: 10

  fileserver:
    image: nginx:alpine
    restart: unless-stopped
    volumes:
      - ./files:/usr/share/nginx/html:ro

  n8n:
    image: docker.n8n.io/n8nio/n8n
    restart: unless-stopped
    ports:
      - "5678:5678"
    environment:
      DB_TYPE: postgresdb
      DB_POSTGRESDB_HOST: postgres
      DB_POSTGRESDB_DATABASE: n8n
      DB_POSTGRESDB_USER: n8n
      DB_POSTGRESDB_PASSWORD: change-me
    volumes:
      - n8n_data:/home/node/.n8n
      - ./files:/home/node/files
    depends_on:
      postgres:
        condition: service_healthy

volumes:
  postgres_data:
  n8n_data:
A few notes on this file:
- Postgres is the database where n8n stores its workflows and credentials.
A database is just a structured place to save data and Postgres is one of the most reliable ones.
n8n works out of the box with a simpler file-based option, but Postgres survives crashes better and scales. - The fileserver is just a tiny web server that serves files from a folder on your server.
It gives your workflows a simple way to read and share static files (business context, outputs) without extra configuration. - The healthcheck makes n8n wait for Postgres to be ready before starting. This avoids the classic race condition on first boot.
- Change the password. Do not use “change-me” in production.
Running n8n
Save the file as docker-compose.yml and start everything:
docker compose up -d
docker compose ps
Open http://YOUR_SERVER_IP:5678 in your browser and complete the owner setup. That is it, n8n is running.
Once you create an account, write down the password just in case and go play with your first automation.
The reason why we installed Postgres before is that otherwise restarting the server would lose all the n8n data.
For future runs, you can run a command like:
ssh -L 5678:localhost:5678 user@YOUR_SERVER_IPWith Tailnet operative, you could actually drop SSH tunnels altogether and just go to localhost:5678 (optional for now).
But this additional setup is quite tricky and without it, you will see this dreaded error message:
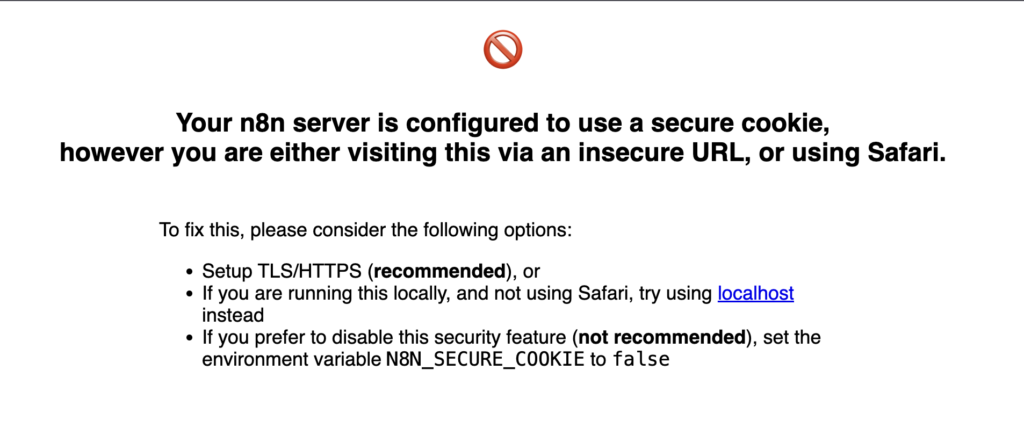
Which means you need to enable something like Tailscale Serve (aka https) and I got some aid from AI here.
If you are still reading and managed to do it, you will be able to access your n8n instance via a dedicated Tailnet URL in your browser.
Inside n8n
You should get a screen like this inside your browser:
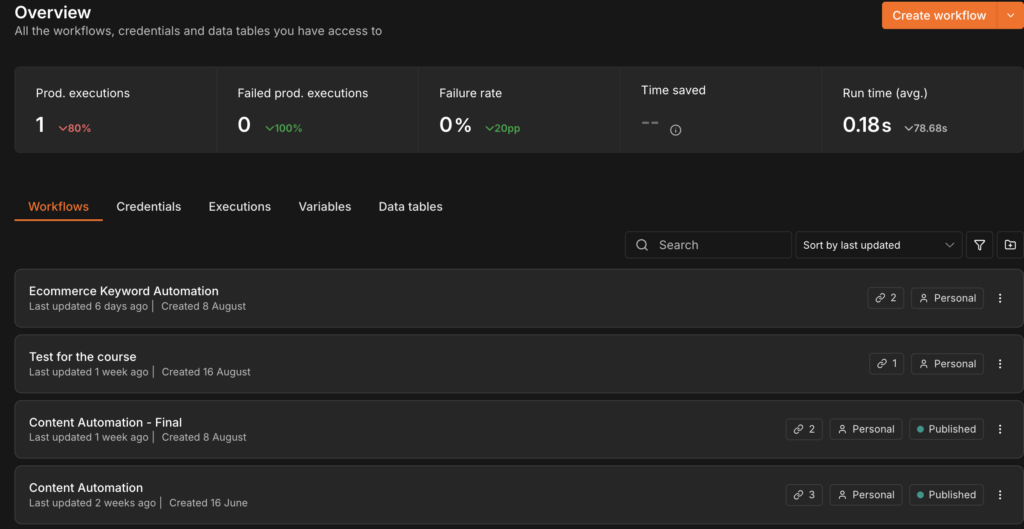
You can see if that works by clicking on “Create Workflow”.
Backups
Your workflows and credentials live in two places: the Postgres database and the n8n data volume. Back both up.
The minimal backup is a script that dumps the database, tars the volumes and ships them to an object store.
I use Cloudflare R2 Object Storage for this.
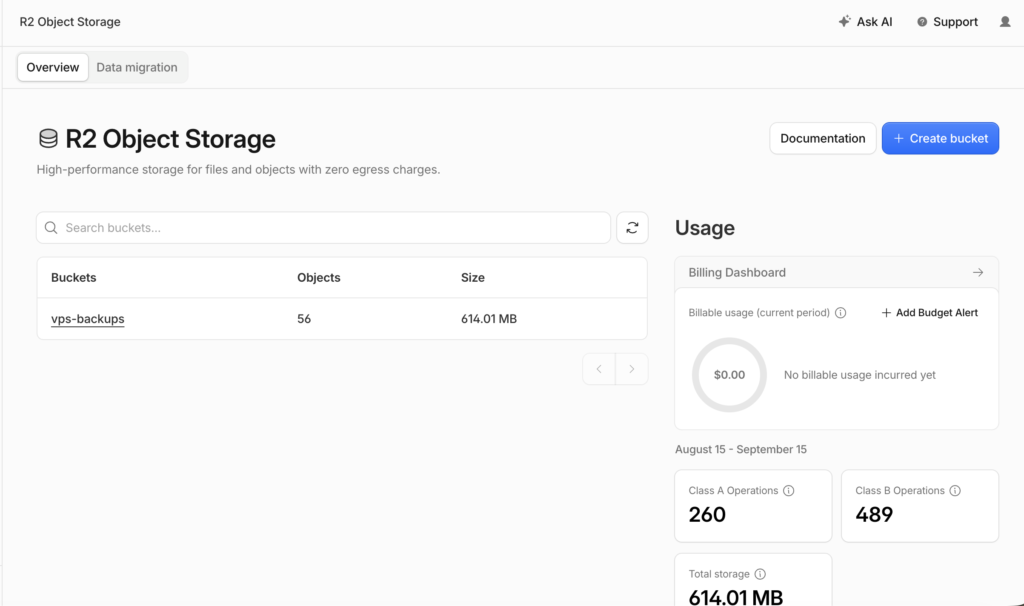
It’s cheap, the API is S3-compatible and there are no egress fees when you need to restore.
Translated: it works with the main storage services and you don’t pay to download your data (get it out).
A cron job (an automated task) runs the backup daily and keeps 14 days of history (which is enough).
docker exec n8n-postgres-1 pg_dump -U n8n n8n | gzip > postgres_n8n.sql.gz
docker run --rm -v n8n_n8n_data:/data:ro -v $(pwd):/backup alpine \
  tar czf /backup/n8n_data.tar.gz -C /data .
# then copy both files to R2 / S3
Test the restore at least once before you proceed.
This step is important for many reasons:
- If Hetzner (or any host) bans you for any reason
- random outages or unpredictable issues
- safety in general, you never know
I personally don’t use Hetzner’s default backups anymore because you pay more money and I already have R2 doing it for me.
You should only use both if you are really really scared about losing your data.
The Future Of Work?
Self-hosting n8n on a Hetzner VPS costs little compared to many SaaS, takes about 30-40 minutes to set up and removes the usage limits that make cloud plans annoying.
The stack is boring on purpose: Ubuntu, Docker, Postgres, eventually nginx.
Nothing too exotic or niche here. That’s what you want from automation infrastructure because this is well documented online.
Next, you can scale this up with some more advanced tools like Hermes Agent on your VPS.